Tasks and Home Pages
Home Pages are assigned to roles and allow users to navigate their tasks in Web Central more easily. This is also how you create a task for your custom reports (created in the Report Wizard) so that they can be accessed. In order to see a home page a user must have a role assigned to them that has a home page, and their page navigation of their user record must be set to “Home Page”.
More Information: https://www.archibus.net/ai/abizfiles/v23.2_help/archibus_help/user_en/archibus.htm#../Subsystems/webc/Content/web_user/using_wc/nav_page/nav_page.htm?
Create Processes and Tasks
Page: View Tasks by Process and Application
Hierarchy: Application – Process – Tasks
Goal: Create custom processes to show on your home pages
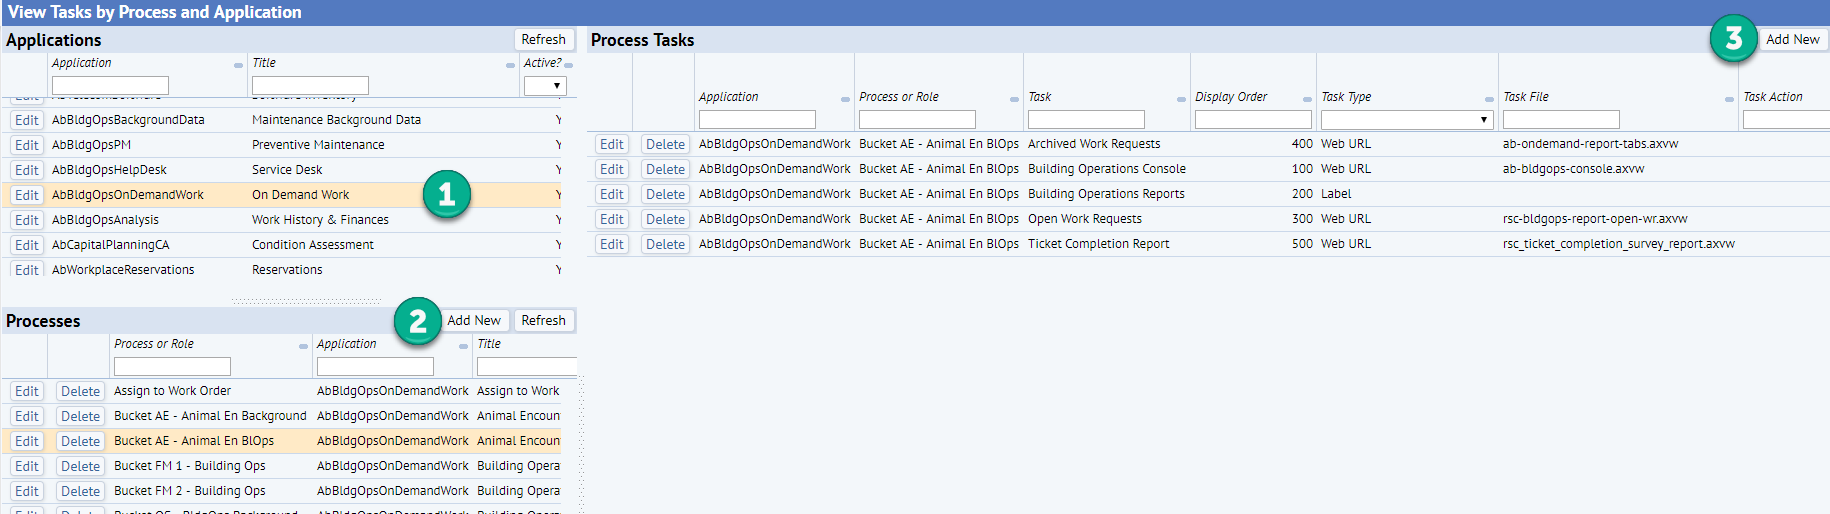
- Select a relevant application from the list
- Quite often AbBldgOpsOnDemandWork
- Next to Processes click “Add New” – these are what appear in the sections of the home page
- Process or Role: Give it a name
- Title: Give it a title
- Process Type: Web Page Navigator Process
- License Level: Activity ACP
- Next to Process Tasks click “Add New” – these are the views and labels that appear in that section of your home page
- Task: Name your Task
- Task Type: Label (non-clickable label) or Web URL (sends you to a view/report)
- Display Order: The order you’d like to see the tasks listed
- Tip: Use “100, 200, 300” for the display order, so that if later you wish to add more reports between them you can just add reports “150, 160, 170” and not have to update other tasks
- Task File: (If you selected Task Type of Web URL) each view has a file name, when you are in a report or console in Web Central you will see this file name at the end of the URL
- Ex: ab-tasks-by-process-and-activity.axvw
- Tip: if you’ve created a custom report using the report wizard then you can put that file here
Create Home Page
Page: Manage Home Pages and Processes
Goal: Create easy to navigate home pages for your users that are specific to their needs
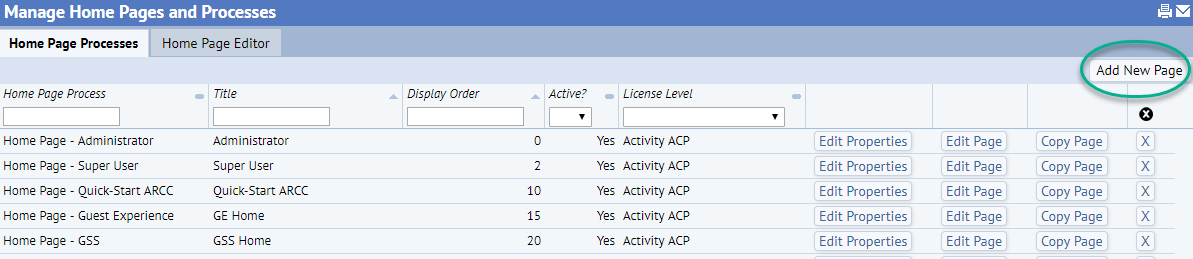
- Click “Add New Page”
- Home Page Process: “Home Page – Name”
- Title: Give it a Name (will show for the users)
- Descriptor File: “ab-navigation-home-Name”
- Display Order: if the users have multiple home pages assigned, the one with the smallest display order will appear first. If they do not have multiple home pages this number does not matter.
- Active? Yes
- License Level: Activity ACP
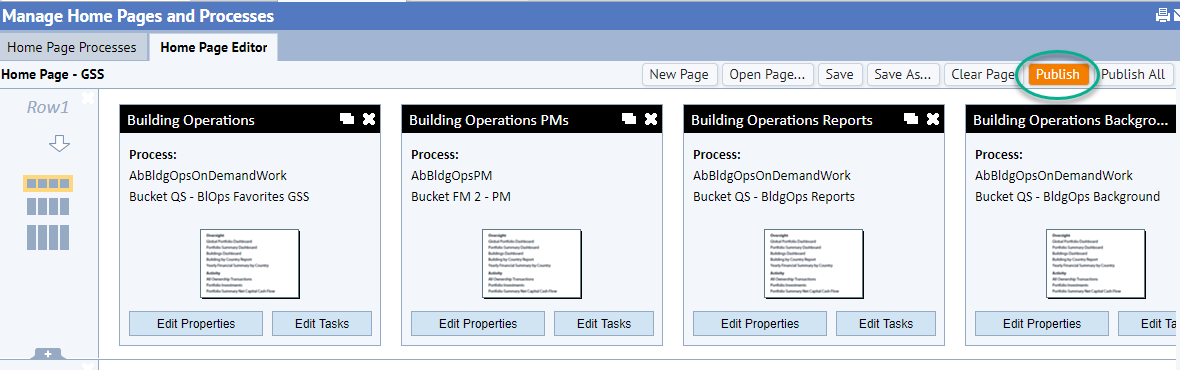
- Add Panels (drag to move) and click “Edit Properties” to define them.
- Title: The title that appears on the panel
- Panel Types: Process, Application Specific, and Favorites
- Process: The processes that you defined in the first step
- Application: select the application your process is under
- Process or role: select the process you created (all the tasks you added will show in this panel)
- Application Specific: Metrics and Alerts
- Favorites: a special panel which allows individual users to drag their favorite tasks to one spot
- Process: The processes that you defined in the first step
- Tool Tip: The text that appears when you hover your cursor (optional)
- Background Shading: the color of the panel
- Publish
Assign Processes to Roles
Page: Assign Processes to Roles or Users
Goal: The processes and the home page itself must be assigned to the role or else they will not show up (blank spot on the home page)
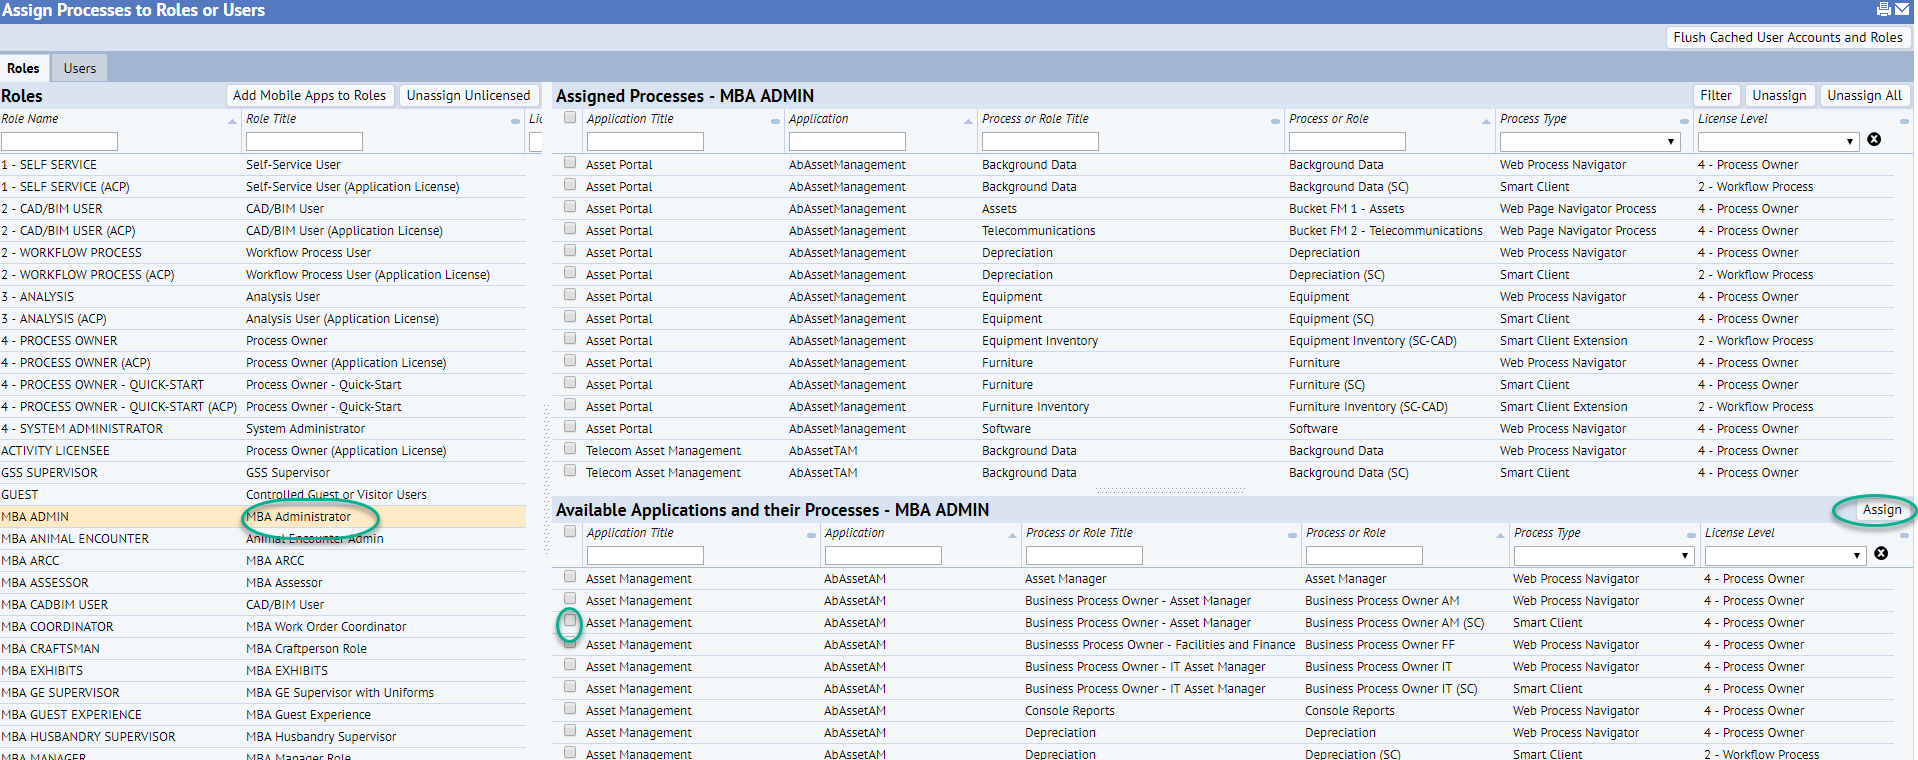
- Select the Role you wish to add the home page to in the left panel. In the right panel the top will show all processes currently assigned to that role, and the bottom will show all processes (Please note: this list includes processes that you are not licensed for)
- Check the box next to the processes you wish to assign, and click “Assign”
- You must assign ALL processes that appear on your home page
- You must assign the home page itself
- If you are unsure if you are licensed for all processes that you added, click “Unassign Unlicensed” to remove unlicensed processes.
Tip: Users can have more than one home page assigned to their role, they can see them by clicking the dropdown next to their username.

Publish Home Pages by Role – Final Step
Page: Publish Home Pages by Role
Goal: To make the changes live to the users, you must publish the home page by role
- Click “Publish” on the home page you wish to publish. A popup will tell you when it has been successfully published and the date last published will update.

- Have the user log out and log back in to see the changes. They may need to clear their cache in some situations.
Was this helpful?
0 / 0