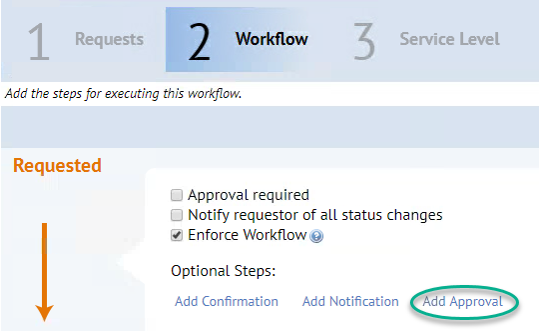
SLA with Approval Step
Create an SLA (manage service level agreements) like you would normally, but in the “workflow” step you add the approval step like this by selecting “Add Approval”.
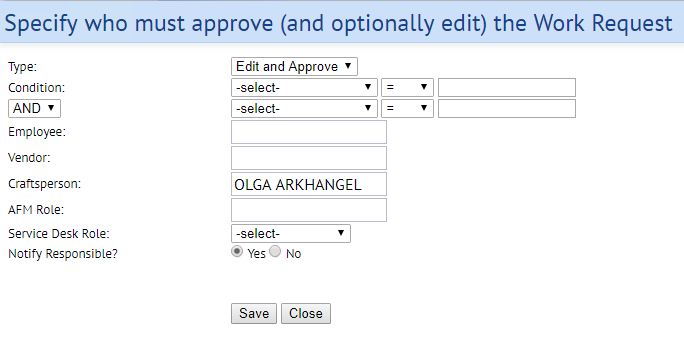
- Add the Craftsperson Name who will need to approve and click “Save”.
- If Web Central notifications are turned on for your installation, you can click “Add Notification” and add the craftsperson if you want them to be notified of the request.
- Please Note: If you are not sure that you have Web Central notifications turned on, speak to RSC. RSC can also set up other notifications for you.

How it should look when you are done:

Was this helpful?
0 / 0