Overview: Users & Roles
The effective use of ARCHIBUS, or any software system, is highly dependent on each user’s personal experience. This makes it important for administrators to provide just the right experience. When deploying ARCHIBUS at an organization that has multiple users, requirements, and security permissions, it is important to define users in a way that provides the access they need to perform effectively without introducing unnecessary complexity or the potential to undermine system integrity, security, or performance.
The beginning of a deployment usually includes a determination of the users who will access the system, how they will access it, and what their experience will be. Once this determination has been made, individuals are assigned user names and passwords. The user name and password authenticates each user (directly or via an authentication device like SSO or active directory). Users are assigned to “roles” used to group users with similar requirements and menus. The menus, often defined by ARCHIBUS “processes,” are defined by an assembly of views or other functionality. Thus, a deployment will always include the following steps:
- User definition and upkeep (in the case of name changes, employment status, etc.)
- User assignment to roles
- “Process” or menu assignment to roles and individuals
It is the job of the ARCHIBUS implementation team to help define an organization’s users, roles, and processes, and the method by which basic security will be managed. Familiarity with ARCHIBUS’ flexibility in the area of data security and permissions can promote the development of effective and scalable roles, rather than roles that are just based on job titles in use at an organization in a given region. While providing secure access to views, the implementation team’s goal should be to allow each user to perform their jobs as simply as possible by reducing excess navigation or “clicking,” and by focusing on user-friendliness and accessibility.
In This Document:
The goal of this document is to give administrators the skills needed to manage users, roles, and menu processes with the Web Central application. By the end of the document, an administrator should be able to
- Define and remove users
- Manage user passwords, roles, and default menus.
- Assign menu processes (with forms, reports, charts, dashboards, etc.) to roles
- Set up a system that provides users with the right access to data and the fewest “clicks.”
Requisite Skills: Users & Roles
ARCHIBUS allows for and provides a variety of techniques for managing passwords, updating system users, applying security, etc. These techniques are often automated or applied in bulk, especially in organizations with hundreds or thousands of users. While this document describes how to manage or make individual changes to users, roles, and processes within Web Central, it is useful to be aware of the different scenarios requiring change and how they system will be maintained. The following skills should provide some context when thinking about developing users and roles.
Skill 1: Understanding User Authentication and Maintenance
Administrators can use Web Central to authenticate its users or choose from a variety of other options. In many instances, organizations integrate ARCHIBUS with active directory, human resource, database, e-mail, or other systems, and even provide access to non-employees. Find the answer to the following types of questions before using Web Central to manage users and roles.
- How are individuals going to be added as users in the ARCHIBUS Users (afm_users) table?
- How are users (and their corresponding employee records) treated when an employee leaves?
- How are user passwords maintained?
- Will non-employees have user accounts, i.e. contractors, vendors, clients?
- How are users synchronized with their corresponding employee, vendor, craftsperson, or project/lease contact records? (The system recognizes individuals via their email address).
- What happens when a user’s name or email account changes due to a marriage or merger?
Skill 2: Understanding Roles
Roles for the organization are typically created based on similar user routines and system capabilities. Some roles are system roles used by all ARCHIBUS projects and other roles are defined for the organization and its users. Find the answer to the following types of questions before using Web Central to develop roles.
- Which roles are system roles and what do they do? For example:
- System Administrator – Accesses system tables and administrative functions.
- Guest – Accesses menus designed for guest users.
- Which roles are organization-specific?
- How do different roles fit into or support organizational processes and workflows?
- What menus will be assigned to each role?
- Are there menus or views that should be assigned to or excluded from individual users?
Skill 3: Understanding Processes
Processes are a collection of tasks placed on a menu. Originally, processes were so-named because they represented a set of tasks used by members of an organization to represent the workflow of their daily routine. For example, the “Room Inventory” process assigned to a space planner would have included tasks for developing building spaces, allocating the spaces to internal departments, running daily calculations of space use, and producing reports of an organization’s space allocation over time. Over the years, processes have come to represent a variety of ways to access the system from different products. For example, processes are used to assign dashboards and Home Pages to users in Web Central and to develop menus on the AutoCAD and Smart Client Process Navigators. Strategically developed and assigned processes allow administrators to design business workflows and provide appropriate permissions to data, before taking advantage of ARCHIBUS’ built-in workflow engines and data security devices.
Defining Roles & Users
When defining the user experience, administrators begin by defining roles and the menus assigned to each. This procedure walks you through the steps for creating a role.
Step 1: Creating Roles
Creating a role consists of defining a name for a group of users who will use the system in a similar manner.
1. In the Web Central application, use the Process Navigator to navigate to the System Administration > ARCHIBUS System Administration > ARCHIBUS Administrator – User and Security process.
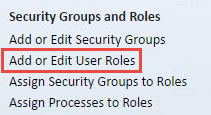
2. Click on the “Add or Edit User Roles” task.
3. Press the “Add New” button on the User Roles panel.

4. Entering the following fields:
- Role Name – A unique identifier, e.g. “ARCH_SPACE.”
- Role Title – A descriptive name, e.g. “ARCHIBUS Space Planner.”
- License Level – A value defined by the ARCHIBUS license and processes, e.g. “ACTIVITY ACP.”
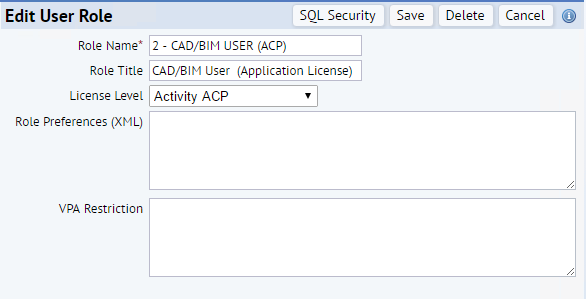
5. Press the “Save” button.
Step 2: Assigning Security Groups to Roles
Every role must be assigned at least one “security group.” The system uses security groups to secure data fields and workflow rules based on conditions defined by the organization and system requirements. Security groups are described in the document on database security and are not used by all organizations, so for the purpose of this training procedure a default security group “%” will be used to give users access to data and workflow rules without restriction.
1. Click on the task called “Assign Security Groups to Roles.”
2. Select a role.
3. Press the “Add New” button in the Security Group panel.
4. Enter a Group Name, e.g. “%.”
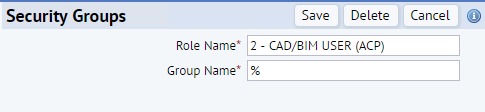
5. Press the “Save” button.
Step 3: Assigning Processes to Roles
Once a role is created, the ARCHIBUS Administrator assigns appropriate application-specific Navigator, Home Page or Dashboard “processes” or menus to the user.
To leverage standard menus for a new user and role, follow these steps:
1. Click on the task called “Assign Processes to Roles.”
2. Select a role for assigning processes from the Roles panel.
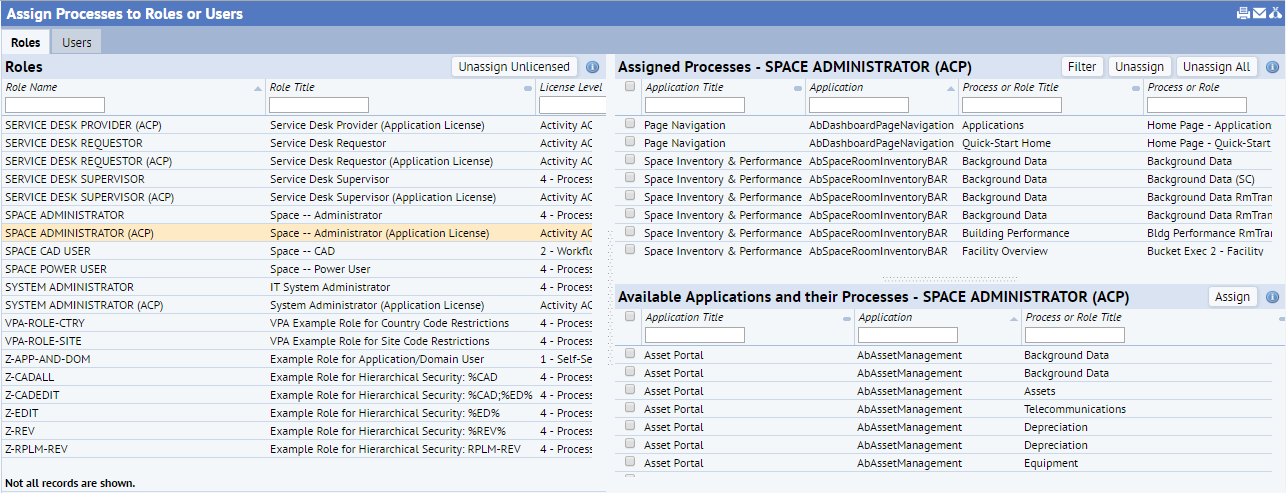
3. From the “Available Applications and their Processes” panel, click on the check boxes for each process that you would like to add and select assign.
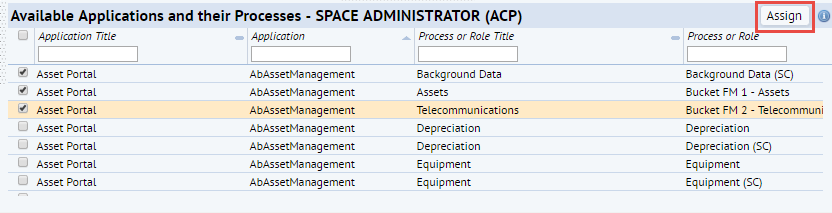
4. Press the “Yes” button in the Confirm dialog box.
5. To make adjustments to the menu, use the “Unassign” or “Unassign All” buttons.
Step 4: Defining Users and Assigning Roles
Defining roles and their processes will take the most time to implement due to the business process mapping that occurs at the beginning of an implementation, but it is a one-time step. Once roles are created, administrators simply assign users to the roles and keep them up-to-date as users change roles. If individual users in a role require more system access than other users in the same role, they may need to be assigned processes directly. This can be done after the users are in the system and assigned to a role.
1. In the Web Central application, navigate to the System Administration > ARCHIBUS System Administration > ARCHIBUS Administrator-Users and Security process.
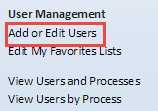
2. Click on the “Add or Edit Users” task.
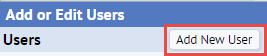
3. Press the “Add New User” button.
4. Enter the following details:
- User Name – The name the user will use to log in (or be logged in) to Web Central.
- Role Name – The role the user will be assigned.
- Email Address – The email address used to identify the individual. The email is extremely important as the system uses the email to recognize an individual as the same person in the event that they are represented in multiple tables in ARCHIBUS: user, employee, craftsperson, vendor, visitor, or project contact.
- Navigation – The user’s default navigation method. The navigation should match the process type of the processes assigned to the user’s role, otherwise the user will not have access to any menus when they try to log in.
- Color Scheme – 1 of 4 default color schemes that can be customized by administrators.
- Locale – The locale of the user’s home location. The locale automatically sets the country and currency displayed for the user upon logging in.
- User-Display Units-of-Measure – The user’s desired display for area fields. Users in the U.S. and U.K. will generally use “Imperial” while others will use “Metric.”
- Use CAD/BIM License – The right to access ARCHIBUS from AutoCAD or Revit.
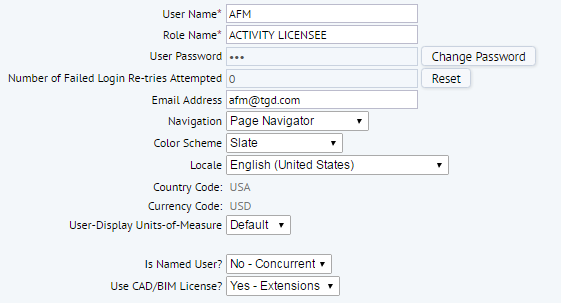
5. Press the “Save” button. Once the user has been saved, the ‘Change Password’ button appears.
6. Press the “Change Password” button.
7. Enter a password (if appropriate for your organization’s authentication method).
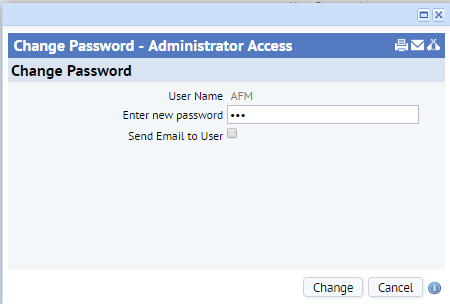
8. Press the “Change” button.
9. Press the “Save” button again.
10. Press the “Sign Out” button to sign out of Web Central.
11. Sign In to Web Central as the new user with the new role.
12. Verify the new user has been created correctly and been given the appropriate permissions.
13. Log out of Web Central and log back in as an administrator.
Was this helpful?
0 / 0